Tips for Taking Travel Photos with Your iPhone
Photo by Fallon Gerst
Written by Sandra Roussy
Camera phones have certainly come a long way. We can now head out on our vacation and rely solely on our smartphones to take amazing photos to preserve memories of our trip forever.

I travel a lot and it it’s not always possible to take my bulky DSLR with me. Sometimes I have to travel light and some situations require me to be more discreet. Carrying around an expensive DSLR is not an effective way to remain low-key and it is sometimes difficult because of the weight and size issues. I started taking photos with my iPhone a while back and I was pleasantly surprised at the quality and creative possibilities that it provided. I shoot photos only with my iPhone during some my travels now.
Let’s take a look at how you can take better travel photos using your iPhone. You too can come back home with some frame-worthy and Instagram-wow shots.
1. Use a Tripod
Carry a compact and lightweight tripod that offers some flexibility. These are great for self-portraits or when you are shooting in low light like at dusk or at night. You can also use a selfie stick to stabilize your iPhone to take sharper photos. The recent iPhones provide great low-light shooting features, but having the camera stabilized will certainly help with image sharpness.
Useful tip: When taking a self-portrait or a group shot that you want to be in, use the iPhone camera’s self-timer. The self-timer is also good if you want to avoid camera shake.
2. Grid Lines
Nothing says amateur like a crooked horizon line. You will want to align the landscape so that it is perfectly straight. Also, turning on the grid lines will allow you to work better with the rule-of-thirds, providing guides to compose your shot. Having the grid toggled on will definitely help you with your composition skills. On the iPhone, the grid lines are quite discreet and will not distract your view.
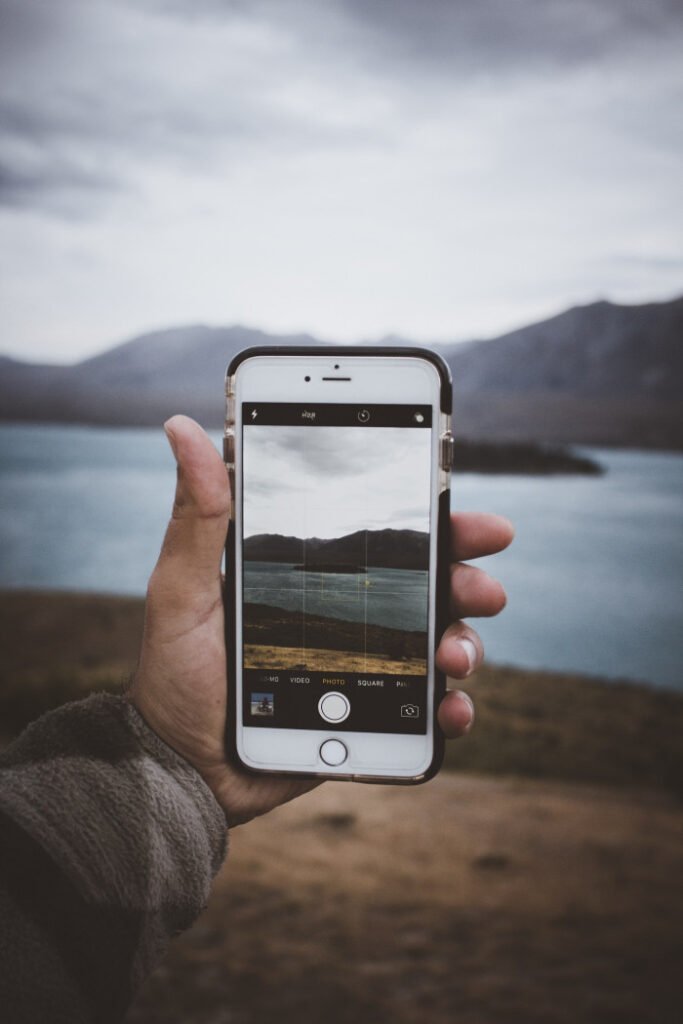
How-to: Go to your settings and click on camera then toggle the grid to on.
3. To Flash or Not to Flash
The iPhone flash is to be used sparingly and only when necessary. The iPhone camera has many great features, but the flash is not one of them.
You can use the flash outdoors when the sun is high and is creating harsh shadows. This can be unappealing, especially when photographing people. The flash will fill in the light a little and smooth out any dark shadows that are created.
Using the iPhone flash is hit-or-miss. I prefer to use as much natural light as possible, or, when needed use another source of light like a flashlight to position extra light on my subject.
4. Focus and Exposure
To get a well-focused shot, tap your screen where you want the camera to focus. You can also lock your focus point by tapping and holding it. An AE/AF Lock sign will appear; you can then recompose your shot while the iPhone camera remains exposed for the focal point you specified.

You can change the exposure of your shot directly in the iPhone camera app. Slide the exposure button that appears once you’ve activated the focus point (the little sun icon) up or down. Sliding up is especially helpful in low light situations or at night.
5. Photo Editing Apps
Once you have a photo that you really like and want to take it up a notch, you can use photo editing apps, software, and filters to make it the best that it can be. You don’t have to learn complex software in order to edit your photos. A user-friendly photo editor like Luminar or Lightroom will make your photos look professional with a few simple clicks.
Try transforming some of your images into black & white photographs with the filters provided in the iPhone camera app.

Useful tip: Be careful not to over-edit or apply too many filters. This can make your photographs look unreal and over-worked. The filters provided in the iPhone camera app are fun to use and were very trendy for a while, but sometimes less is best.
6. HDR

HDR stands for High Dynamic Range and the iPhone uses this to create well exposed images. It snaps several shots at different exposures and merges them together to create a well exposed final photo. Sometimes it can create an image that looks unreal, but it usually produces a good photo. You can turn the HDR feature on or off on your iPhone in the settings.
7. Attachable Lenses
Many companies are producing lenses that you can attach to your iPhone providing more versatility to your camera phone. Some will give you the option to zoom or do macro shots, and others will provide a wide-angle or fisheye.
Useful tip: Zooming in with your iPhone will considerably lower the quality and sharpness of the photo and can even create camera shake. This is where an attachable zoom lens comes in handy. Also, if you like to do food photography, then an attachable macro lens would be a great gadget to have.
8. Observe Colors
When traveling, always be on the lookout for pops of color or contrasts between colors. A bright blue sky against a colorful building can offer up a great image opportunity. The iPhone HDR feature comes in very handy when shooting contrasts of colors that are in different light.

9. Use the Shooting Modes
Your iPhone offers various shooting modes; from square to pano. The latest iPhone models come with a portrait mode that lets you shoot with a shallower depth of field, making the background blurry and the focus on the object.

Useful tip: Remember that Instagram photos are displayed square. If this is your eventual destination for your photos, shooting in square mode will help you keep total control of your composition.
10. Tell a Story
Don’t just shoot photos. When you are traveling, there are countless opportunities for taking great photographs. Take the time to observe your surroundings. Look at people going about their daily lives. I find that markets and places where local people mingle tend to be interesting places to get photos that transform into authentic stories.

With iPhones continually improving and offering better camera feature functions, it’s normal that even professional photographers now shoot travel photos with iPhone cameras.
Happy travels, and happy shooting with your iPhone camera!
 Previous Post
 Next Post