Top 50 Digital Photography Tips
Photography is both an art form and a skill. It’s an art form in that it’s a medium for self-expression and photographers can be as creative with their exposures as they need to, to get the images they want. Yet, it’s also a skill with rules and techniques that need to be honed and mastered to yield what are technically great images.
The foolproof way to stunning photos is by combining the two and finding that sweet spot between creativity and technique. Below, we’ve compiled the best photography tricks, tips, and techniques to nudge you in the right direction, whether you want to perfect your landscape photos, take better sunset images, or try your hand at steel wool photography.
Landscape photography composition tips

There’s more to landscape photography than just finding a beautiful panorama, pointing your camera at it, and clicking the shutter. To create landscape shots that are visually captivating to the viewers, here are some things to factor into your exposures.
1. Find Color
Color sets the mood of an image and makes it more dynamic. Luckily, it’s easy to find color in nature. Just as yellows, oranges, and reds solicit feelings of warmth and comfort, using the blues of sky and water tend to bring forth a sense of calm or cold. The greens of a forest, by contrast, bring about a feeling of freshness.
2. Try Filling the Frame
In photography, filling the frame essentially means taking advantage of a significant part of your frame and composing your shot so that your subject occupies the frame. To do so, get in close to your subject and find a way for that subject to dominate your frame.
3. The Rule of Thirds
Following the Rule of Thirds, you divide your frame into nine equal rectangles—three across and three down—that acts like a guide to tell you where you can position the most critical elements in your scene. Put these elements along the spots where the lines intersect to yield more creative compositions.
4. Centered
There is something about centering your compositions that’s appealing in certain situations. When you have symmetric elements and a simple horizontal line, placing an object right in the middle might actually be visually appealing—a free-standing mountain, a river running through a forest, or a single tree in the middle of a field.
5. Use Negative Space
Negative space is the space in the frame between and around your subject. When shooting landscapes, using negative space to its full advantage can be a powerful technique and make for really cool minimalist images.
Travel photography tips

Traveling provides plenty of opportunities to capture incredible memories and bring home beautiful photos. We’ve put together our best tips for travelers that will help you to bring home better photos. Before you get lost in your grand adventure, make sure to read on.
1. Use Color Combinations
Be on the hunt for unique color combinations that show different aspects of your environment. The contrasting colors of a blue door and the yellow wall its on, for example, will make for a striking shot.
2. Communicate Scale
When photographing landscape images like towering mountains or expansive waters, communicate the scale of their size by adding a human element in the frame.
3. Create a Sunset Strategy
Snapping shots at sunset will give your images an almost ethereal golden glow. During your travels, find what time the sun sets where you are and make sure you’re at the location you’d like to photograph about 15-20 minutes before it sets so you can set up and scout the best spots.
4. Stay in the Moment
Remind yourself to stay in the moment while snapping your travel photos so that you are fully focused and in the right mindset to create more poignant, powerful images.
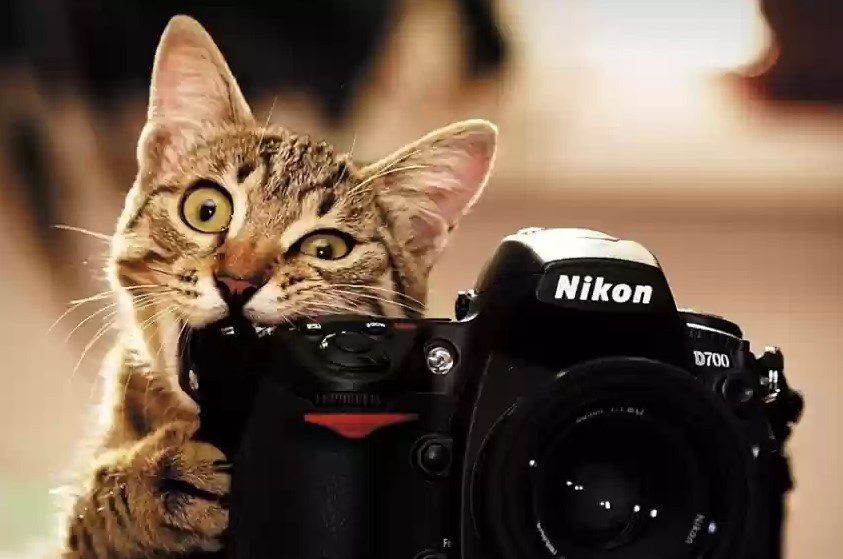
5. Know Your Camera
When traveling, things happen fast, and being familiar and comfortable with your camera is very important. Before your trip, know your camera’s settings and basic operation.
Night Photography Tips

The nighttime can be a venue for many spectacular photographs—star trails, Milky Way arching over the horizon, light-painted roads. When done right, nighttime images can convey an incredible atmosphere that’s impossible to duplicate at any other time of the day.
1. Use a Tripod, Set a Timer
Long exposures are necessary to create impressive nighttime shots. Use a tripod and either set the camera’s timer or use a remote shutter to avoid blur and get sharp, crisp images.
2. Focus Manually
Although newer, more powerful cameras now have a much better auto focus in low light situations, manual focus is still the best way to go. It’s especially useful when you’re shooting the night sky.
3. Widen the Aperture
The wider aperture, the more light your camera takes in, in a shorter amount of time. Using apertures from F/2 to F/5.6 are ideal especially when you’re shooting the night sky.
4. Use a Higher ISO
You might need to increase your ISO setting just a tad during nighttime shots. However, just remember that increasing your ISO will inevitably lead to more noise on your images. More powerful cameras have better noise control, so try and avoid using the highest ones.
5. Remove the Flash
Flash is useful in certain situations, but when you’re taking images of landscapes and the night sky, the flash will simply get in the way.
Steel wool photography tips
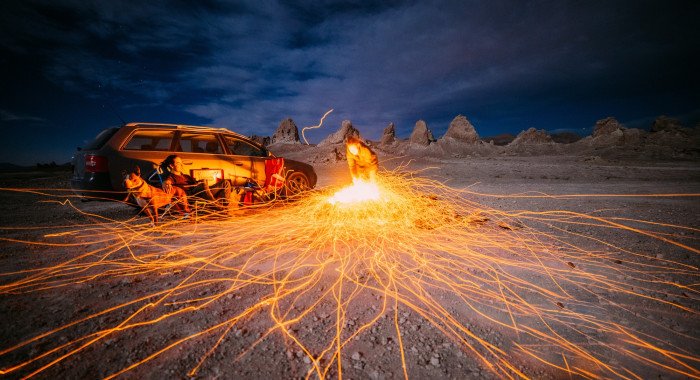
Steel wool photography is an interesting way of painting with light and creating exciting photos like no other. You too can learn how to take these stunning images, but to do so, there are things you need to do, pieces of equipment you need to have, and precautions you need to take.
1. Prepare the Steel Wool
Put the steel wool inside the whisk, fluffing it a little before inserting it to produce the best sparks and packing it loosely as it needs air to burn properly. Tie the handle of the whisk with the steel cable or chain tightly. This is what you will be spinning.
2. Set Your Camera
Use a wide-angle lens to create a more dramatic effect. Mount your camera on the tripod and make sure to place it far enough from where you will burn the steel wool to avoid damage. Set the ISO to 100, aperture to F/8 or F/11, white balance to auto or tungsten, and shutter speed to 5-20 seconds. Because you are shooting in the dark, your camera might have difficulties finding the focus. Use the flashlight to shine a light at your spinner, and set the focus.
3. Light The Steel Wool and Spin
Light the steel wool and start spinning! The steel wool will burn for about 20 seconds, so you need to be ready to take those shots. If you’re lucky, you may get 2-3 shots in before the fire burns outs completely.
4. Experiment
There are different techniques you can use when spinning the burning steel wool. You can spin in circles in front of you or above your head. You can also ask a friend to walk or make figures while spinning to create pretty cool effects.
5. Edit in Post
If your shots do not come out exactly like you wanted, there’s still a way to salvage your the images if they’re not completely blown out or underexposed. You can always use a photo editor like PHOTOLEMUR to help get some of the details back.
Forest photography tips

Woods and forests make for picturesque photography subjects, especially when light is dappling through the canopy from above or when the leaves have changed colors for the fall season. Yet, taking photos of them still takes a little bit of skill and flair. Here are some tips to taking spectacular forest photos.
1. Do Your Research
Do your research to understand the seasons, know when the flora are in bloom, figure out the current weather conditions, and learn about the location and its woody inhabitants, not to mention figuring out the best time of day for photos.
2. Remember the Time
Be aware of the time it takes to visit a new location: how long it takes to drive, hike, and scout the perfect spots. If you don’t, you risk missing the perfect time to take photos, or get stuck in the middle of nowhere with nothing to show for it.
3. Pack the Right Equipment
Having the right equipment is essential. Consider bringing both a wide-angle and telephoto lenses so you have options. Think about bringing a tripod and using a polarizing filter. Bring the right clothes to protect yourself against the elements.
4. Add Other Elements
Consider including other elements in your frame—a running river, a lovely lake, even a lone hiker—to breathe more life into your image and make it more dynamic.
5. Enhance in Post Processing
Photo editing applications are designed to help you enhance your images, and it’s good practice to utilize them, even if it’s just to adjust the basic stuff like brightness, luminosity, and shadow. For newbies, software like Luminar is a great automatic editing alternative. It improves your images’ color, brightness, and vibrancy, as well as makes the necessary lens corrections and adds some face enhancements.
Mountain photography tips
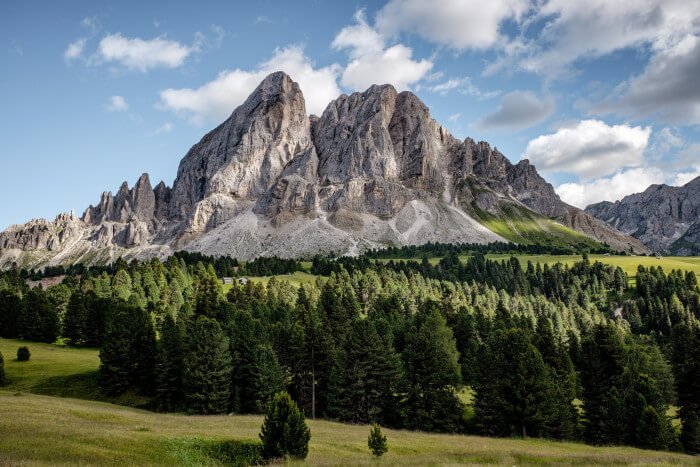
As a photographer, snapping images of mountains is a breeze if you follow these few simple tips from professional photographers who know a lot about taking outdoor landscape photography.
Photographer Toma Bonciu, who’s known as Photo Tom on YouTube, offers a 10-minute video offering nine tips and rules you can use to shoot more powerful landscape photographs. Many of these tips are ideally suited for taking photos of mountains. Among these are adding depth, identifying color spots, and negative space.
1. The Nine Equal Parts
Self-taught photographer Jonathan Griffith of Alpine Exposures suggests remembering the rule of thirds. Imagine the frame being divided into nine equal parts by two equally spaced horizontal lines and two evenly spaced vertical lines. Those who support the technique claim that aligning a subject with these points creates more tension, energy, and interest in the composition.
2. The Depth
Griffith also suggests placing a high value on sharpness and the so-called depth of field. He explains that the latter is easier to understand when you think of it as a depth of focus, or the ability to have all elements in the image in or out of focus.
3. The Background
Reed Hoffmann suggests using mountains as a backdrop on your scene. “That helps gives some context to the main subject (which is in the foreground). Whatever it is, though, the mountains add not just another interesting visual element, but some sense of location and scale as well,” the photographer explains.
4. The Effect of Drama
David Peterson says to add clouds to your images to add some powerful drama. “It’s no different when you’re up in the mountains. For some of the best mountain pictures, I like to get up above the fog and use it to frame the shot,” he says.
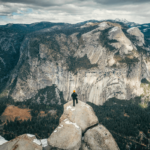
5. The Contrast of Size
What’s the most significant thing about a mountain? It’s enormity, of course. Therefore, Peterson also suggests putting people in the front of mountain shoots. In doing so, it “gives you a sense of how big the mountains are. People are the ideal foreground subject for taking pictures of mountains.”
Sunset photography tips

There is no magic formula to shooting sunsets. Nature is unpredictable and is ever changing, so you need to be armed with a few basic tricks when going out to shoot sunsets. Here are a few of useful tips to help you get the best sunset photos.
1. Consider the Sun and the Surroundings
A common mistake photographers make is to want to shoot the sun and only the sun. A sun and nothing else will most often than not make an uninteresting photograph. Analyze your surroundings and include interesting elements in your frame to make your photos more captivating.
2. Weather and Skies
Obviously, the weather will have an impact on your photos, but sometimes not the way you might think. If there are a lot of clouds in the sky, worry not. Those clouds might just display and enhance the beautiful purples, pinks, and oranges of the sunset, and this phenomenon can last up to a full half hour past the official setting of the sun.
3. Golden Hour
The Golden Hour is the hour preceding the actual sunset and provides exceptional photo opportunities. During this time, the light is warm, and the shadows are soft and long. Try to play with these elements to create some cool photographs.
4. Reflections
Look for sources of water. A lake, a river, an ocean, or even a puddle of rainwater make great reflecting elements for some pretty stunning sunset photos. If you’re in a cityscape, try looking at the buildings around you. Get creative and shoot the setting sun from a different perspective.
5. Composition
Remember that you don’t have to place the sun right in the middle of your frame for a sunset shot. Sometimes composing your photo differently will make it more interesting. Try putting the main element off to one side of the image and the horizon line on the bottom third of the composition to make more space for the sky.
Portrait photography tips
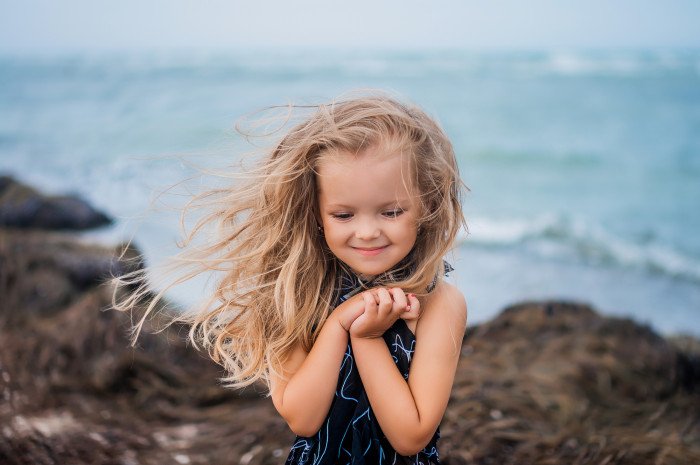
Portrait photography doesn’t have to be complicated or even tricky. With a little preparation and some simple rules to take into account, you can take those amazing portraits of your family and friends.
1. Prepare Your Models
Whether you’re going for a casual, natural look or doing a high fashion shoot, it’s a good idea to get your model/s prepped from their shoot outfits to their hair and make-up. Be sure to choose outfits and looks that match well with the concept of your shoot.
2. Make Your Models Feel Comfortable
Take some time to talk with them before starting to not only make them feel comfortable and relaxed, but also to connect with them. Try shooting your models in environments they feel comfortable in so that you get more natural looking portraits. Also make it fun for them so you’re more likely to get beautiful smiles and happy smiling eyes.
3. Light!
Make sure that you have plenty of light whether you’re shooting indoors or outdoors, and that the lighting is soft so it doesn’t create heavy shadows on your subjects’ faces. Feel free to play around with the lighting until you achieve a look where all the subjects are well lit.
4. Pay Attention to the Environment
Keep the attention on your subject. Choose an environment that doesn’t have distracting or unnecessary elements. Always be aware of your background to make sure that there isn’t anything that you don’t want in your portraits.
5. Try Different Angles
Experiment with different angles. Try to get on a higher level or crouch low to give an interesting dimension to your portraits. If you are shooting children, get down to their level so that you don’t look too imposing.
Pet photography tips

While pet photography can be fun and playful, it can also be very tricky and frustrating. Not only are there many aspects that go into capturing that perfect pet photo, but you also have to get that pet to stay still long enough for you to get everything together and take your shots.
1. Establish Comfort and Trust
When they see the camera, there’s a good chance that pets will run off or look away. Establish comfort and trust. Get down onto their level on the ground next to them, roll around, and give them love and snuggles and make them feel comfortable.
2. Capture Your Pet’s Character
Maybe you have a tortoise who is slow and methodical, a cat who is sassy, or a dog who is lazy but loyal. Think of creative ways you can capture your pet’s quirks and personality so that they come out in the photographs.
3. Think About Close-Ups
From far away, a pet can get lost in a blur of fur and legs. So, think about close-up shots. Make their eyes stand out or bring focus to their nose or whiskers. Often, this can enhance your pet’s flair and personality, and make your photos more eye-catching.
4. Get Creative
To capture a more captivating shot, get creative and experiment. Take your pup to an incredible field of flowers or bring your bunny to a small pond and wait until he dips his pink nose in the water. Think outside of the box and you’ll yield fun and interesting results.
5. Use Natural Light
The flash can frighten animals and make them jumpy so if you’re looking to shoot indoors, look for a spot with lots of soft natural light.
Food photography tips

Food photography isn’t as easy as it seems. There’s more to it than simply arranging everything flat on the table and taking a snapshot with your smart phone from above. If you ever wondered why your food photos might not be as good as the ones you see on Instagram, it’s most likely because there are other factors you haven’t considered that many pro food photographers are experienced enough to utilize for every single shot they take.
1. Shoot with soft, natural light.
As tempted as you might be to use the unflattering fluorescent lighting, resist the urge to take that snap. As a general rule in photography, natural light is king; and this is true for food photography as well. It isn’t hard to find. Just look for the nearest window that lets in that beautiful natural light, preferably a soft one, and set up next to it.
2. Mind your background.
Whether you’re shooting overhead or from the side, it’s important to pay attention to your background. Believe it or not, unflattering backgrounds can also ruin your photo. Once you’ve framed your shot, take a second or two to look at what’s happening in the background.
3. Keep it uncluttered. Minimalize.
Speaking of distractions, removing clutter and minimalizing the elements in your frame are great ways to instantly improve that image. Just like you’re taking a second or two to inspect your background, also take a few seconds to examine that you don’t have unnecessary elements poking in your frame. The tip of a fork, for example, or someone’s elbow can also ruin a shot.
4. Add a human element.
It may sound like an Instagram cliché, but adding a human element to your photos can really make a huge difference. Not only does this bring a splash of emotion into the photo, but it also makes it more immediately relatable to the audience. Have someone scoop up a spoonful of soup from the bowl as you’re taking a photo or photograph a person’s hands as they’re cutting cheese or pouring wine.
5. Embrace the colors.
Adding vibrant colors in your shot is another easy way to instantaneously make your food shots appealing. It could be anything from adding a touch of red in an otherwise neutral-colored dish like an oatmeal or using an already colorful subject to setting up against a pastel-colored wall.
 Previous Post
 Next Post