The Rule of Thirds Explained

If you’re new to photography, you may have heard people talking about certain ‘rules’ of composition that they use to create better photos themselves. These rules can be a great way for beginners to start improving their photography without really doing too much. The reason some of these compositional methods have become as important as to be known as rules is that they usually work for their intended purposes.
One of these is known as the Rule of Thirds. This is one of the first, and usually the only, compositional technique that photographers learn. That is because it is very easy to understand and it makes for more pleasing images. A lot of those who learn this rule often stick with it forever. One reason why it is such a famous technique is that it has its roots in other kinds of visual and fine arts. It can be dated back to the late 1790s when visual artists would use it in some forms of art.
So, What Exactly Is The Rule of Thirds?
The easiest way to understand this technique is that the image in question is broken into thirds, vertically and horizontally both. Most modern cameras come with a 3×3 grid option that you can turn on. When you do, you will see that the viewfinder has 3 lines horizontally and 3 vertically. These lines essentially divide the single frame into 9 sub-frames. And these sub-frames are the basis for this compositional technique.

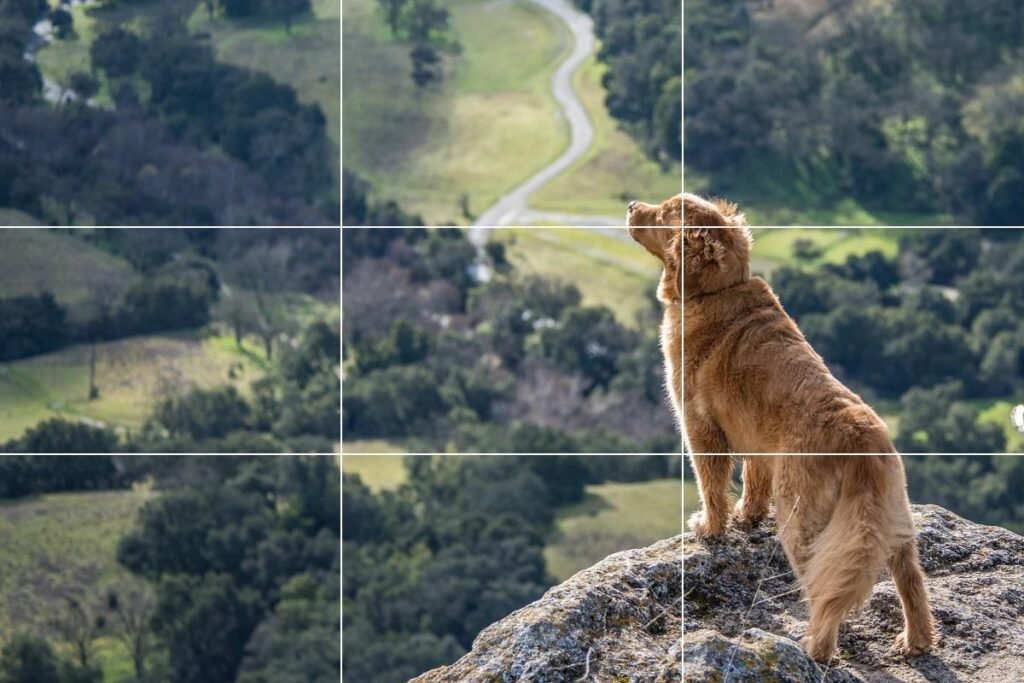
So, what you do is that you compose your images by placing your main point of interest on one of the intersections that are created by these lines. When you do that, your overall scene automatically ‘breaks’ into thirds and you end up with an image where your subject is placed slightly off-centered. This usually leads to much more interesting shots than simply placing your subject in the middle of the frame or too far to one side.
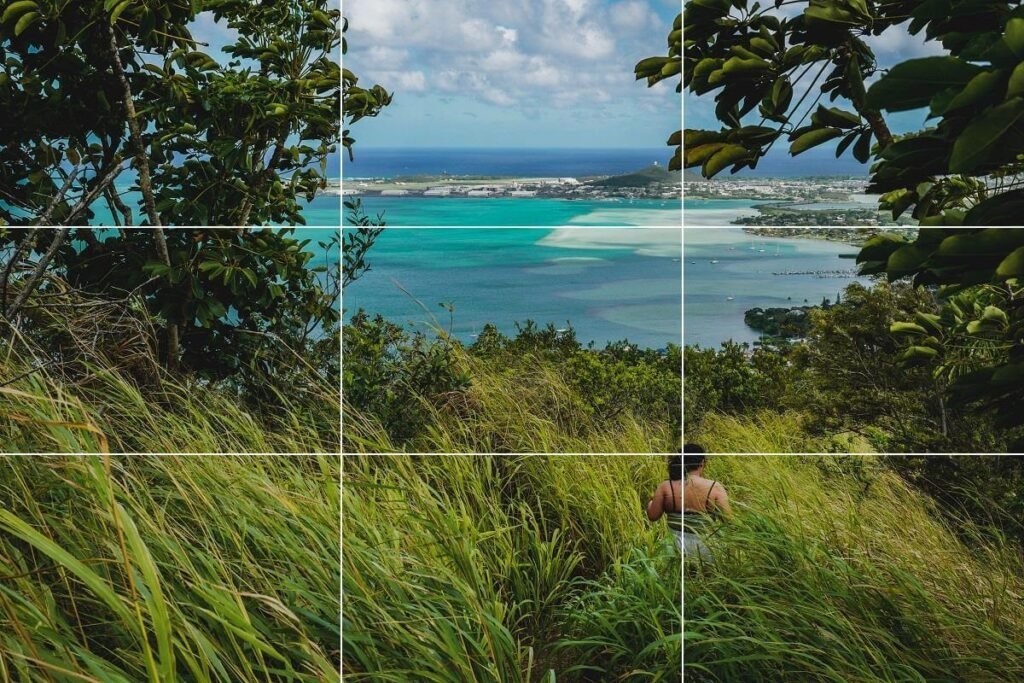
If you want the Rule of Thirds explained, it’s best to look at some images. This image shows the technique in action. Notice how the flower is not centered in the frame but is positioned off to one side. Also, note how it is not aligned with the horizontal or vertical centerline of the frame either. It seems like it has been moved diagonally towards the top right from the center of the frame. And all of this makes the image look more interesting. The image below shows you how the flower is placed on one of the intersections in the frame.

Placing images along an intersection is not the only way to use this method. What if you are shooting a landscape image or a more abstract shot where you don’t necessarily have a subject that you can place on one of those points? In those cases, you can use this rule to divide the image into thirds either horizontally or vertically. For example, if you’re shooting a landscape, a good idea would be to place the horizon line on the bottom horizontal division for a dynamic look. Similarly, if your image has walls or buildings, you could divide the frame by using one of the vertical columns that are created by the 3×3 grid.
Rule of Thirds – Before and After

Let’s take a look at an image where we apply this rule on one instance and then use a more centered composition in another.
The image on the left has the horizon line centered in the frame. While it looks good, it looks fairly average. But by placing the horizon line according to the Rule of Thirds and including more sky (negative space) in the image, it adds more drama and dynamism to the frame.
Why Does It Work?
In your quest of having the Rule of Thirds explained, you might wonder why it actually works. There are two main reasons for it.
1. Images Look Balanced
This is more of a ‘feeling’ than anything else but when an image follows this method of composition, it naturally feels more balanced to the viewer. The key elements in your image create a visual interest when they are placed along these divisions. The main subject is off to one side while most of the negative space is off to another. And while the negative space is more in quantity, the image still looks balanced because all the interest is where the subject is.
2. Images Look Dynamic
The second reason is that this kind of composition makes the image look more dynamic. The images force the viewer’s eye to move to a certain point instead of placing all the focus in the middle of the frame. It adds a little drama to the frame and often tells a greater story because the negative space may also have the background or another subject.
In the image below, you see the context of the boat and not just the boat itself. And while the boat is definitely the subject of the image, some importance is also given to the hill on the side because it has some breathing room of its own.

How To Follow It?
The first thing you should do is recognize who or what the main subject of your image is. Once you have done that, you should try and place that subject on one of the intersections or near one of them. Do this based on the background too. Which part of the background do you wish to showcase in your image? If you want the background towards the top, place your subject towards the bottom, and so on.
It is not easy at first to visualize how the frame is divided into thirds, so make sure to turn on the 3×3 grid on your phone or camera. Most phones these days and almost all modern cameras have such a grid. This is the best little tool you can use to start composing your shots in a better way without too much thought.
And remember that if you mess up your framing a little or even a lot, then you can always crop into your images!
Should You Always Use It?
Not at all! While it may be the most important or popular rule in photographic composition, you don’t always have to use it. There are other rules that you can also follow, or not follow. You can make every image your own if you are going for a unique take on a scene. Sometimes, you might want to include only a tiny bit of your subject in the frame. Other times, you might want to centralize your subject for a dramatic look. Using a centralized composition is often a great idea for things that are symmetrical as this composition can enhance their symmetry.
So, despite being a great composition tool to create better photos, you don’t have to feel pressured to always use the Rule of Thirds while out shooting. Only use it when you feel like it will make your images better. It’s a great way for beginners to start framing their shots in a more pleasing way because it helps them break away from a natural inclination to center the subject in a frame.
If you’re a beginner, just ask yourself how many times you’ve taken a picture of yourself or a friend by placing them right in the center of the image. Most people do that because it seems like the right way to do it. But if you wish to grow as a photographer and want to create beautiful images, you should try breaking away from that habit. And the Rule of Thirds is a great tool to help you do that.
 Previous Post